Wide Range of Products
Local Stock in Ontario
Specialized Support in Bio
Important crop rotation steps
Written by Martin Meuldijk | Last update: 9. August 2023
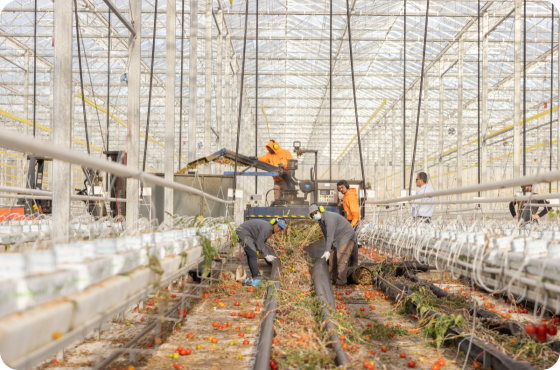
Greenhouse crop removal is the most labour-intensive stage in the crop rotation process. It's important to follow the correct steps to make crop rotation as quick and efficient as possible. This article provides a step-by-step plan, and some helpful advice from one of our specialists, to assist you in removing crops.

Before we outline the steps for crop rotation, there's an important factor to consider. Ensure you make adequate preparations beforehand by ordering all necessary supplies in advance and, where required, perform maintenance on the machinery and equipment needed for the crop rotation process. This will help you avoid unexpected surprises and will help you through the process quickly and efficiently.
Thoroughly cleaning a greenhouse between two crop cycles is crucial. On one hand, it reduces the risk of pests and pathogens carrying over to the new crop. And on the other hand, it contributes to the integrated pest management strategy for the upcoming growing season. Crop rotation machines, like the Bio Chopper, can expedite the crop cleanout process.
Before you embark on the crop rotation steps, it's essential to stop watering in a timely manner, which is typically two days before commencing crop rotation. This allows plants to absorb as much water as possible from the substrate mat. Consequently, the mats aren't as heavy when you begin removing them.
The optimal time to shred crops is when they contain minimal water while still being 'fresh'. Therefore, we recommend starting the shredding process three days after the last watering. To do this, follow the steps below.
For greenhouse plant removal and crop shredding, one or more machines are often utilized. It's crucial to prevent any metal from coming into contact with the crops or soil fabric. Metal entering the machinery can cause damage or even breakage. Therefore, if you're removing the crop after the last harvest, follow these ten steps for the crop rotation process:
1. Lay out the ground cover at the top, preferably using an unwinder for transport mats. Ensure the ground cover is straight and taut between the pipes of the pipe rail system on the pad. Remember to leave an extra two meters of ground cover at the path's end.
2. Lower the plants to the appropriate working level.
3. Trim the plants just above the substrate using large scissors.
4. Lower the plants with the assistance of the pipe rail trolley. Hold onto the crop wire and the hook from which you cut the rope. Work in the direction that allows the plant to fall freely, placing the stem and substrate in front of you. Place the high wire hook in a container. Avoid letting it get caught in the crop as this could damage the machine.
5. Position plants in the centre of the fabric and ensure organic matter is on the fabric. The less protrusion, the less waste that will end up on the ground. The fabric is 130 cm wide, so if you keep organic matter to a metre in width, you'll have 15cm of space on both sides. Avoid pressing the crop between the pipe rail or folding the crop at the pad's end. Instead, use the extra meters fabric to lay plants on top. Do not place the substrate mats on the fabric as they cannot be shredded.
6. The substrate mats contain plugs connected to the dripping hose. Remove the plugs from the substrate mat block. Leave the hoses attached to the irrigation hose, but remove the dripper for cleaning and disinfection.
7. Attach the fabric to the crop shredder Bio Chopper and shred the crop.
8. Remove the substrate mats, either manually or using the Bio Hopper XL for mechanical removal.
9. If necessary, clear the paths of any films.
10. Finally, gather the remaining crop residues and dispose of them in the waste container.
*Note: Some growers opt to place the crop under the gutter rather than between the pipe rail. However, this can lead to the crop getting stuck on the gutter, making it more challenging to remove.
In this video, Weterings Machinery showcases their range of products for crop removal, including crop shredders and other greenhouse-clearing machinery they produce themselves.
During the crop rotation process, a lot of waste can be produced. Ensure you have an adequate number of waste containers ready beforehand. The speed you can clear the crop is also dependent on waste logistics. Waiting around for an empty container can be time-consuming. The number of containers needed can be calculated as follows:
- A 100-metre row of tomatoes generates approximately 2 m3 of waste in two minutes.
- At least one complete row should fit into a container, so for 100-metre rows of tomatoes, containers of at least 2,000L are needed.
- Opt for waste containers that can be emptied using a shovel or forklift for quicker disposal. Additionally, a buffer container enhances speed and ensures a smooth logistics process.
Once the crops and materials have been removed from the greenhouse, you can begin cleaning and disinfecting the growing gutters, windows, and other items. High-pressure cleaners are effective for cleaning growing gutters. The AquaJet makes this process even easier as it can navigate into the paths.
After the greenhouse has been cleared, you can begin the cleaning process for the greenhouse.